|
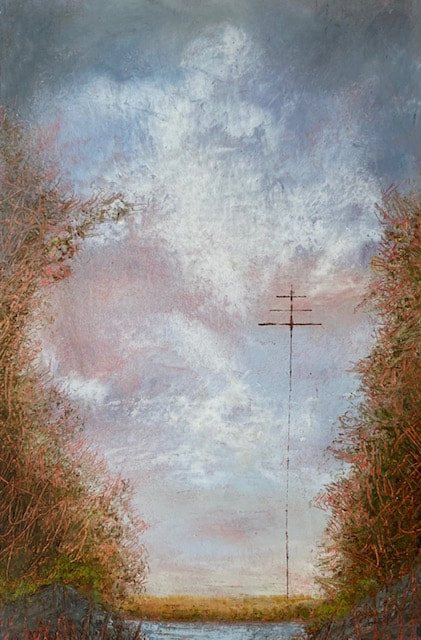
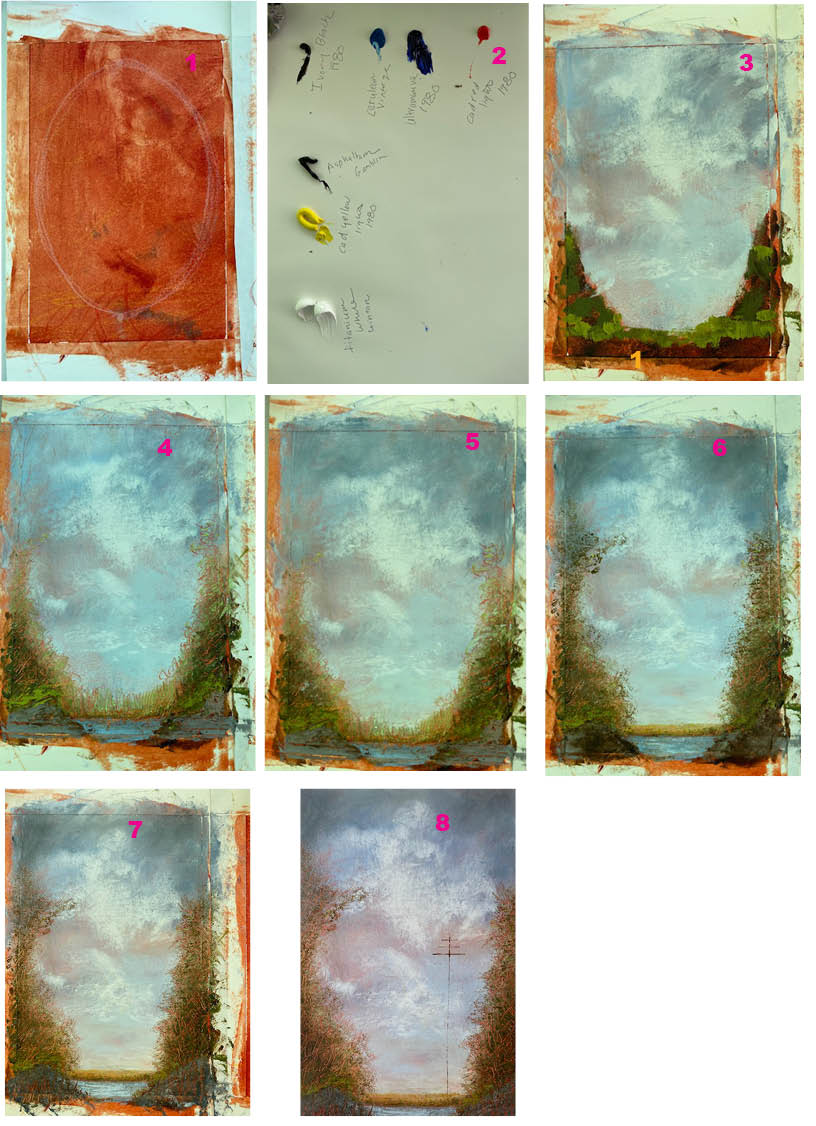
When the COVID-19 pandemic got real and the stay at home order was in effect, I started painting these small landscapes. It was a strange response because I had never painted a landscape in my life. I didn't consciously set out to do this, this is just what happened. Maybe it was because we were stuck at home and I longed to be somewhere else. Maybe it was the sense of isolation and the longing to connect with others (which is why I'm writing this now). Time will tell. If you would like to see other paintings in the series, click here. Here's a step by step process. If you have any questions, please feel free to email me. Step 1 I taped off a piece of Arches Oil Paper. I meant to make it 5" x 7" but it is more like 4.5" x 7" which is unfortunate because I will have to custom make a panel for it! If you want to mount your work onto a panel, tape your paper just a little larger than the standard. I made some quick marks with a Stabilo woody pencil and then applied a coat of Gamblin Brown Pink mixed 50/50 with cold wax using a messermeister dough squeegee. Sometimes those pencil marks show through and enrich the painting. They didn't on this one! It is important to use a transparent paint at this stage. It will stain the paper and the color will be revealed when you scratch back in later. This is not the case with an opaque color. I usually let this dry overnight and it is fine. This one dried for a week. Step 2 I set up my palette. Student grade paint works fine when you are mixing it with 50/50 wax. Unless noted, these colors are Gamblin 1980. Titanium White Cadmium Yellow Light Cadmium Red Light Ivory Black Ultramarine Blue Cerulean Blue (a twenty year old tube I inherited) Asphaltam by Gamblin I mixed a few colors from these and then mixed with the wax 50/50. I like to make greens by mixing the black and yellow. Step 3 I quickly blocked in some colors. For the sky, I applied thin layers of a few shades of blue and purple/gray and then used white for the sky. It is best to apply with the squeegee and fuss with it as little as possible.I did not put the paint on very thick. I used asphalam and a couple of shades of green for the land and vegetation. This was done quickly just to add basic structure. Step 4 I started scratching into the paint with a bamboo skewer. My original concept was to have the vines go to the top of the painting but it didn't look good so repaired the sky. I added a pond and some rocks just to make it more interesting and it's a good device to unite the sky color with the rest of the painting. Step 5 I added a darker gray to the top of the painting. I intentionally made the shape unite with the vegetation so the lighter sky is in a circle shape in the center of the painting. I added a greener blue and some white at the horizon. Step 6 I turned the land shape at the horizon into sand, introducing yellow ochre to the palette. I think the straighter line there adds a needed to contrast to all of the scratched out marks. I worked on the rocks in the foreground, putting in a darker value. I crumpled a small piece of tissue paper and dipped it in paint the color of the vegetation. Spread the paint out thinly on your palette before you dip the tissue to aviod getting too much paint. I dabbed the edges of the vegetation. It is an effective method for getting the vegetation color on top of the wet sky without making a muddy mess. Step 7 Here I just refined everything. I touched up the sky. I took my gloves off and used my finger to do this. By the way, the warm color in the sky on the left is the toned Brown Pink ground peeking through. At some point, I gently rubbed this area to make that more pronounced. I added a little paint with similar tones on the right.I added more scratches to the vegetation, using the edge of a palette knife to get thin marks. I added more reflection to the water and added some blue/gray tones to the rocks to tie them in with the colors at the top of the painting. Step 8 I untaped the painting. Sometimes at this stage I'll see something I want to fix but I did not with this one. I added the communication/telephone type pole by thinly spreading a 50/50 paint wax mixture onto my palette and dipping a piece of cardstock into it. That's it! When it is completely dry, in a few weeks I will mount it onto a custom-made (grrr!!) panel with using acrylic gel medium as the glue.
1 Comment
|


 RSS Feed